How to Grow Hackberry Tree from Seeds: Step-by-Step Guide
Thinking about adding a hackberry tree to your yard? They’re pretty tough trees, and growing them from hackberry tree seeds isn’t as complicated as you might think. You just need to know the steps. It’s a great way to connect with nature and help out local wildlife, too. This guide will walk you through everything you need to know to get your hackberry tree started from scratch.
Key Takeaways
- Collecting hackberry seeds is best done in late fall when the berries are dark purple or black and soft, but not rotten.
- Seeds need to be cleaned of pulp and then undergo cold stratification for 60-90 days to break dormancy.
- Sow stratified hackberry tree seeds about half an inch deep in well-draining soil, keeping them moist and in bright, indirect light.
- Hackberry seedlings need consistent moisture, bright light, and can be fertilized lightly once they develop true leaves.
- Established hackberry trees are low-maintenance, drought-tolerant, and beneficial for wildlife, offering shade and urban tolerance.
What Is a Hackberry Tree (Celtis occidentalis) and Why Grow It?
Understanding the Hackberry Tree
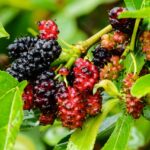
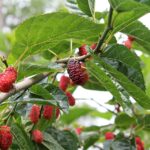
The hackberry tree, scientifically known as Celtis occidentalis, is a real trooper in the plant world. Native to a good chunk of North America, this tree is known for being super tough and adaptable. It’s a deciduous tree, meaning it sheds its leaves annually, usually turning a nice yellow in the fall. While its autumn color isn’t the main attraction, the tree does produce small, dark purple berries that are a favorite snack for birds and squirrels. These berries ripen in late summer or early fall and can stick around through the winter, offering a bit of visual interest and a food source. The bark is pretty interesting too; younger branches might have corky bits, while older bark can look a bit warty or even scaly. Hackberries grow at a pretty steady pace, about 12 to 15 inches per year.
Why You Might Want to Grow a Hackberry
So, why bother growing a hackberry from seed? Well, for starters, they’re incredibly low-maintenance once they get going. They can handle all sorts of conditions, from dry spells to less-than-ideal soil, and they’re even pretty good with urban pollution and salt. This makes them a great choice if you live in a city or just don’t have a lot of time for fussy gardening. Plus, they’re fantastic for wildlife. Those berries are a big draw for birds and small mammals, and the tree itself offers shelter. They also have a decent root system that can help with soil erosion. If you’re looking for a shade tree that’s also a habitat provider and doesn’t demand much attention, the hackberry is worth considering. They’re also quite hardy, doing well in USDA zones 3 through 9, which covers a lot of ground.
Key Characteristics of Hackberry Trees
Here’s a quick rundown of what makes hackberry trees stand out:
- Native Status: Originates from central and northeastern North America.
- Growth Habit: Typically grows 30 to 50 feet tall with a spread of 25 to 45 feet, often developing a vase-like shape.
- Foliage: Bright green leaves that turn yellow in autumn.
- Fruit: Small, dark red to purple berries that mature in late summer/early fall and are edible.
- Hardiness: Tolerant of USDA Zones 2-9, handling both heat and cold.
- Site Adaptability: Thrives in full sun but tolerates partial shade; adaptable to various soil types, pH levels, and conditions like drought and pollution.
Hackberry trees are known for their resilience and ability to thrive in challenging environments, making them a practical choice for many landscapes. Their tolerance for urban conditions and varied soil types means they can often succeed where other trees might struggle.
If you’re interested in starting your hackberry, collecting seeds is the first step. You’ll want to look for those dark purple berries in the fall. You can find more information on seed collection and preparation atHackberry Seed Collection.
When and How to Harvest Hackberry Seeds (Fruit Collection Tips)
Collecting hackberry seeds is a pretty straightforward process, but timing is key. You’ll want to wait until late fall, usually around October or November, when the berries have ripened. Look for the fruits to turn a deep purple or almost black color. The best hackberry tree seed pods are those that feel slightly soft to the touch but aren’t mushy or showing signs of rot. It’s a good idea to gather more seeds than you think you’ll need, as not all of them will be viable. Try to pick berries from healthy, mature trees to ensure you’re starting with good genetic material. Remember, fresh seeds generally have better germination rates, so try to use them within a few months of collecting them.
Here’s a quick rundown of what to look for:
- Color: Deep purple to black.
- Texture: Slightly soft, not hard or mushy.
- Source: Healthy, mature trees.
It’s important to collect seeds from healthy parent trees. This increases the chances of your new hackberry trees being strong and resilient. Don’t be discouraged if you don’t find perfect berries on every tree; sometimes you have to search a bit.
Once you’ve collected your berries, you’ll need to prepare the seeds for the next steps. This involves removing the fleshy pulp from around the hard seed inside each berry. You can do this by gently crushing the berries and then washing away the pulp. Don’t worry about eating the pulp yourself; the berries are edible and have a pleasant, slightly sweet taste. This cleaning step is important for preventing mold and ensuring the seeds are ready for stratification.
Removing Fruit Pulp and Cleaning Seeds (Preparation Step)
After you’ve gathered your hackberry fruits, the next step is getting those seeds ready for their long journey to becoming a tree. This involves cleaning off all that fruity stuff and making sure the seeds are in good shape for the dormancy-breaking process. It might seem a bit tedious, but it’s pretty important.
Removing the Pulp
First things first, you need to get the pulp off the seeds. The hackberry fruit is a little berry with a hard seed inside. You can do this a couple of ways. One method is to gently crush the berries. Don’t go crazy here, just enough to break them open. Then, you’ll want to wash away the pulp. Running them under cool water in a sieve usually does the trick. You can also just eat the pulp yourself if you’re feeling adventurous – the berries are edible, and some people even say they taste a bit like dates. It’s a nice little snack while you’re working.
Cleaning the Seeds
Once the bulk of the pulp is gone, give the seeds a good rinse. You want to make sure they’re clean. Use fresh, cool water and rinse them thoroughly. Some people like to let them soak in water for a bit after the initial pulp removal, which can help loosen any remaining bits. Just be sure to drain them well afterward. You don’t want them sitting in water for too long at this stage, as that can cause other problems, like mold. It’s kind of like washing dishes; you want them clean, but not left soaking indefinitely. We’re aiming for clean seeds, not soggy ones. A good rinse and drain is usually sufficient. This preparation is key before moving on to breaking their dormancy, which is the next big step. Getting this right helps avoid issues like a 507 Insufficient Storage error on your server, metaphorically speaking, of course – we don’t want any storage problems for our tiny seeds.
Preparing for Stratification
After cleaning, it’s time to get the seeds ready for their cold stratification. This means putting them in a medium that will keep them moist but not wet. A common method is to use slightly damp sand or peat moss. You’ll place the clean, drained seeds into a sealed plastic bag or container along with this damp medium. Make sure the medium is just moist, not soaking wet. You can test this by squeezing a bit; it should hold its shape but not drip water. This setup will mimic the natural conditions seeds experience over winter, which is exactly what they need to get ready to sprout. This is a really important step for successful hackberry seed germination.
Scarification and Soaking
Hackberry seeds have a tough outer shell, which is normal. This hard coat is nature’s way of protecting the little guy inside until conditions are just right. But for us, it means we need to give them a little nudge to get them going. This nudge is called scarification, and it’s all about making it easier for water to get into the seed.
Simple Water Soak
The easiest way to scarify hackberry seeds is a simple water soak. It’s not complicated at all. You just need a container and some water.
- Get a clean glass jar or bowl.
- Pour room temperature water over your cleaned hackberry seeds.
- Let them soak for about 12 to 24 hours. Don’t go much longer than that, or you might run into problems.
This process helps to soften that tough seed coat. If you notice any seeds floating after a few hours, they’re probably not viable, so you can toss them. The ones that sink are the ones we want to work with.
Physical Scarification (Optional but Helpful)
Sometimes, even after soaking, the seed coat is still pretty stubborn. In these cases, you might need to do a little physical work. This is where you gently break or roughen up the seed coat so water can penetrate more easily.
- Sanding: You can use a small piece of sandpaper or a nail file to gently rub the seed coat. Just be careful not to damage the inside of the seed. You’re just trying to create a tiny weak spot.
- Nicking: Another method is to carefully nick the seed coat with a sharp knife or clippers. Again, the key is to be gentle and avoid cutting too deep into the seed itself. You’re not trying to cut the seed in half, just break the outer layer.
Remember, the goal here is to help water get in, not to harm the seed. If you’re unsure, the water soak alone is often enough for hackberry seeds. You can find more about tree seed germination techniques if you want to explore other methods.
After scarifying, you’ll want to rinse the seeds and get them ready for the next step, which is usually cold stratification. It’s like giving them a little spa treatment before they go into their winter nap.
Cold Stratification Protocol (60–90 Days in Moist Sand)
Hackberry seeds, like many tree seeds, have a natural defense mechanism to prevent them from sprouting too early. This is called dormancy, and we need to break it to get them to grow. Cold stratification is basically tricking the seeds into thinking they’ve gone through a winter, which signals them to wake up and sprout.
The Process
To do this, you’ll need some slightly damp sand. You don’t want it soaking wet, just moist enough that it holds together when you squeeze it. A good test is to grab a handful; if a few drops of water come out, it’s about right. You can use a plastic bag or a container with a lid for this. Put the clean, dry seeds into the bag or container, and then add the moist sand. Make sure the seeds are mixed well with the sand. The key is to keep the seeds in a cool, moist environment for about 60 to 90 days.
Checking on Your Seeds
It’s a good idea to check on your seeds every couple of weeks. Just open the bag or container and feel the sand. If it seems dry, add a tiny bit of water to keep it moist. You’re looking for that same slightly damp consistency. If you happen to see any signs of germination, like a little sprout starting to emerge, that’s great! You can go ahead and plant those seeds right away. Otherwise, just reseal the bag and put it back in the fridge. This whole process helps prepare the seeds for successful germination.
What to Expect
After the 60 to 90 days are up, your hackberry seeds should be ready to sow. They’ll have gone through the simulated winter and should be much more receptive to sprouting when planted in warm soil. This step might seem a bit tedious, but it really makes a big difference in getting those hackberry trees started.
When and How to Sow Stratified Hackberry Seeds
Alright, so you’ve gone through the whole process of getting your hackberry seeds ready – cleaned them, stratified them, and now they’re practically begging to be planted. It’s time to get these little guys into some soil.
Timing Your Sowing
After your seeds have completed their cold stratification period, which usually takes about 60 to 90 days, they’re ready to go. The best time to sow them is typically in the spring, once the danger of frost has passed. This gives the young seedlings a nice, long growing season to establish themselves before winter rolls around again. You can also sow them directly outdoors in the late fall, mimicking how they’d naturally germinate after a winter in the ground. This method is often preferred by experienced gardeners as it allows nature to handle the stratification process.
Planting the Seeds
When you’re ready to plant, grab some containers. Seed trays or small pots work fine, but make sure they have drainage holes because hackberry roots don’t like sitting in soggy soil. A good potting mix is key here; something well-draining is best. You can mix in some compost and perlite to make it even better.
- Prepare Containers: Fill your chosen pots or trays with the potting mix, leaving about an inch of space at the top.
- Sow Seeds: Plant the stratified hackberry seeds about half an inch deep. You can plant a few seeds per pot, just in case not all of them sprout.
- Water Gently: Give the soil a gentle watering. You want it moist, but not soaking wet. A spray bottle can be helpful here to avoid washing the seeds away.
- Provide Initial Conditions: Place the containers in a spot that gets bright, indirect light. Keep the soil consistently moist, but again, don’t let it get waterlogged. You’re aiming for that perfect damp-but-not-soggy feel.
Remember, hackberry trees develop a pretty significant taproot, so starting them in deeper containers from the get-go can save you some transplanting headaches later on. It’s a small detail, but it helps them get a good start.
If you’re sowing directly outdoors in the fall, just plant them about half to one inch deep in a weed-free spot and keep the soil moist. Nature will take care of the rest, and you should see sprouts in the spring. Learning about seed preparation is a great way to get started with growing your trees.
Germination Conditions
Once your hackberry seeds have gone through the necessary dormancy-breaking steps, it’s time to get them ready to sprout. Getting the conditions just right is pretty important for success.
Light Requirements
For germination, hackberry seeds don’t need a lot of light. Too much direct sun can be harmful at this stage. Think of it like a cozy, dimly lit spot where things can start to grow without being blasted by the sun. Once you see those first little sprouts popping up, you’ll want to gradually move them to a brighter location, but still avoid harsh, direct sunlight for a while. Giving them plenty of light once they’re a bit bigger helps them grow strong.
Temperature and Moisture
Temperature is a big deal for germination. You’re aiming for a consistently warm environment. Room temperature, somewhere around 70-75°F (21-24°C), is usually ideal. It’s not super hot, but it’s not cold. Keeping the soil consistently moist is just as important. You don’t want it soggy, because that can lead to rot, but it shouldn’t dry out either. It should feel like a wrung-out sponge – damp but not dripping.
- Maintain consistent moisture: Check the soil daily. If the top layer feels dry, mist it lightly.
- Control the temperature: Use a heat mat if your room tends to get cool, or place the seed tray in a warmer part of your house.
- Provide humidity: Covering your seed tray with a clear plastic lid or a plastic bag can help keep the moisture levels up. Just make sure to poke a few small holes for air circulation to prevent mold.
It’s all about creating a stable environment where the seeds feel like they’re getting the signal to wake up and grow. Too much fluctuation in temperature or moisture can throw them off.
Sowing Depth and Spacing
When you sow the seeds, you want to plant them at the right depth. A good rule of thumb is to plant them about as deep as they are wide. So, if a seed is about 1/4 inch across, plant it about 1/4 inch deep. You can use a fine layer of sand or the same soil mix you’re using to cover them gently. If you’re using a seed tray, give them a little space so they aren’t all crammed together. This helps prevent disease and makes it easier to transplant them later.
Caring for Seedlings
Watering Your Hackberry Seedlings
Once your hackberry seeds have sprouted and you’ve got tiny seedlings, keeping them properly watered is super important. You want the soil to stay consistently moist, kind of like a wrung-out sponge, but not waterlogged. Too much water can lead to root rot, and that’s no good. A good way to check if it’s time to water is to stick your finger about an inch into the soil. If it feels dry, it’s time to water. Gentle watering is best, so you don’t disturb the delicate roots. Using a watering can with a fine rose or a spray bottle works well.
Providing the Right Light
Newly sprouted hackberry seedlings need bright, indirect light. Think of a spot that gets a good amount of light but isn’t in direct, harsh sun all day. Too much direct sun can scorch those tender leaves. As they get a bit bigger and stronger, you can gradually introduce them to more direct sunlight. If you’re growing them indoors, a south-facing window is usually a good bet, but keep an eye on them to make sure they aren’t getting too much intense heat. You might even need to rotate the pots so all sides of the plant get some light.
Transplanting Your Hackberry Seedlings
When your hackberry seedlings have developed a few sets of true leaves and are a few inches tall, they’re probably ready for a bigger home. You can transplant them into individual pots or, if you’re feeling ambitious, directly into their final outdoor spot if the weather is right. When transplanting, be gentle with the roots. Try not to disturb them too much. Dig a hole that’s big enough for the root ball, place the seedling in it, and backfill with soil. Water them well after transplanting to help settle the soil around the roots. It’s a good idea to harden them off before planting them outside permanently. This means gradually exposing them to outdoor conditions over a week or two. You can start by putting them outside for a few hours in a sheltered spot and slowly increase the time and exposure.
Remember, patience is key when growing trees from seed. Your little hackberry seedlings are on their way to becoming sturdy trees, but they need consistent care during their early stages. Don’t get discouraged if some don’t make it; it’s all part of the process.
Here’s a quick rundown of what to aim for:
- Moisture: Keep soil consistently moist, not soggy.
- Light: Bright, indirect light initially, gradually increasing to more direct sun.
- Handling: Be gentle with roots during transplanting.
- Hardening Off: Gradually acclimate seedlings to outdoor conditions before permanent planting.
If you’re worried about your seedlings getting enough nutrients, you can use a very diluted liquid fertilizer once they’ve established themselves a bit. Just make sure it’s a balanced fertilizer and follow the instructions carefully. Over-fertilizing can do more harm than good. It’s also a good idea to keep an eye out for any signs of pests or diseases, though hackberries are generally pretty tough trees. If you notice any issues, address them promptly. Proper care now will help your hackberry trees thrive for years to come. If you ever run into storage issues with your gardening supplies, remember that insufficient storage can halt progress.
Choosing the Right Planting Site
Alright, so you’ve got your hackberry seeds ready to go, and now it’s time to think about where they’ll grow up. Picking the right spot is pretty important, not just for the tree’s health but also for how much work you’ll have to do later on. Hackberries are pretty tough, which is good news for us gardeners.
Soil Preferences
These trees aren’t super picky about soil, which is a big plus. They can handle a pretty wide range of soil types, from sandy stuff to heavier clay. What they don’t like, though, is soil that stays waterlogged. So, if you’ve got a spot that turns into a swamp after it rains, maybe look elsewhere. Good drainage is the key here. They also don’t mind if the soil is a bit alkaline or even a little salty, which makes them a good option for areas near the coast or places where roads get salted in the winter.
Sunlight Requirements
Hackberry trees really do best when they get plenty of sun. Full sun is ideal, meaning at least six hours of direct sunlight per day. While they can tolerate some shade, especially when they’re young, they won’t grow as vigorously or look as full. If you’re planting one in a shadier spot, just be prepared for a more open, less dense canopy. The Mediterranean hackberry, for instance, is known to thrive in sunny conditions, offering a long period of foliage cover.
Spacing Considerations
When you’re planting, think about how big this tree will get. Hackberries can grow to be quite large, often reaching 30 to 50 feet tall and spreading out 30 to 50 feet wide. You’ll want to give it enough room so it’s not crowding other trees or structures. A good rule of thumb is to plant it at least 20 to 30 feet away from buildings, power lines, or other large trees. This spacing allows for good air circulation, which helps prevent diseases, and gives the branches plenty of room to spread out naturally.
Climate Adaptability
One of the great things about hackberries is how adaptable they are to different climates. They’re hardy trees that can handle a wide range of temperatures. They’re native to much of North America and can survive in USDA hardiness zones 2 through 9, which is a pretty big range. This means they can handle pretty cold winters and also tolerate hot summers. They’re not fussy about humidity levels either, making them a solid choice for many different regions.
Choosing a planting site that meets these needs will set your hackberry tree up for a long, healthy life with minimal fuss. It’s all about giving it the right start.
Maintenance & Long-Term Care
Once your hackberry tree is established, it’s pretty much a hands-off kind of plant, which is great if you’re busy. They’re tough cookies, handling all sorts of urban grit like pollution and not-so-great soil. Plus, they’re drought-tolerant once they get going, so you don’t have to fuss over watering too much.
Pruning
Pruning is mostly about keeping the tree healthy and looking good. You’ll want to do this when the tree is dormant, usually in late winter or early spring before new growth starts. Just snip off any branches that are dead, damaged, or crossing each other. This helps the tree grow strong and prevents disease. As the tree gets bigger, you might need to call in a professional for the higher branches. Regularly removing weak or dead branches is key to maintaining the tree’s structure and health.
Pests and Diseases
Hackberries are generally pretty resistant to major pests and diseases. You might see some cosmetic issues, though. Hackberry nipple galls, caused by tiny insects, can make leaves look a bit bumpy, but they don’t harm the tree. If your tree’s leaves look pale, it might be a sign of too much alkaline soil, which you can fix with some soil amendments. Sometimes, you’ll see a cluster of twiggy growth called witches’-broom, often due to mites and mildew. It looks a bit odd, especially in winter, but it’s mostly just for show and doesn’t hurt the tree’s vigor.
Wildlife Benefits
These trees are like a buffet and a hotel for local wildlife. The berries, which ripen in late summer and fall, are a favorite food for over 40 species of birds, as well as squirrels and other critters, especially when other food sources are scarce in winter. The dense branches also offer good shelter and nesting spots. Planting a hackberry is a really good way to support your local ecosystem. You can find out more about native trees like this at native plant societies.
Long-Term Care
Generally, hackberries don’t need much fertilizer. If your soil is really poor, a light feeding in spring might help, but usually, they’re fine on their own. They grow at a decent pace, about 12-18 inches a year, and can reach heights of 40-60 feet. They’re hardy in zones 3-9, so they can handle a lot of different climates. Just remember that patience is a virtue when growing from seed; the first year might be slow as the roots establish themselves.
Keeping your trees healthy involves regular care, like trimming and watching out for bugs or animals. Proper pruning helps trees grow strong and look good. If you notice any problems with your trees, it’s best to get expert help. For all your tree care needs, visit our website to learn more and get a free quote today!
Frequently Asked Questions
Where do hackberry trees grow best?
Hackberry trees are super tough and can grow almost anywhere in North America, from cold northern spots to warmer southern areas. They like sunny places and can handle different kinds of soil, even dry or wet ones, once they get going. They’re also great for cities because they don’t mind pollution or salty air.
Can I eat hackberry berries and seeds?
Yes, you can eat the berries from a hackberry tree! They taste a bit like sweet dates. Native Americans used to eat them fresh or dry them and grind them into flour. The seeds inside are also edible.
What good are hackberry trees for nature?
Hackberry trees are fantastic for wildlife! Their berries are a food source for over 40 kinds of birds and many fuzzy critters, especially in the fall and winter. They also offer shelter and a safe place for animals to live.
Why do hackberry seeds need special treatment to grow?
Getting hackberry seeds to sprout means you need to trick them into thinking they’ve been through a winter. This is called cold stratification. You’ll need to keep the seeds cold and moist for about 60 to 90 days. It’s like giving them a chilly nap before they wake up and grow.
How do I plant the hackberry seeds after they’re ready?
After giving the seeds their cold nap (stratification), plant them about half an inch deep in pots with good soil. Keep the soil damp but not soggy, and give them bright light, but not direct hot sun. It usually takes a few weeks for them to sprout.
When can I move my hackberry seedlings?
When your little hackberry seedlings are about 6 to 8 inches tall and have a few sets of leaves, you can move them. You can put them in bigger pots or, if the weather is right, plant them directly outside in their permanent spot.
What kind of care do hackberry trees need?
Hackberry trees don’t need much fuss. You can give them a little fertilizer in the spring if the soil isn’t very good. Pruning is best done when the tree is resting in winter, just to trim off any dead or weak branches. They’re pretty resistant to pests and diseases, and the issues they do get are usually just cosmetic.
My hackberry seeds are growing slowly. Is that normal?
Be patient! Hackberry seeds can take their time, and the seedlings might grow slowly in the first year as they build strong roots. Keep watering them and giving them light, and eventually, they’ll grow into sturdy trees.
Request a Quote
Our Services