
Can You Grow Mulberry Trees from Cuttings? Easy Guide
So, you’re considering growing mulberry trees and wondering if taking cuttings is a good approach. I’ve been looking into this myself, and honestly, it seems like a pretty neat project. The main reason to try propagating from cuttings is that you get a plant that’s exactly like the parent tree. This is a significant development, especially if you have a mulberry tree that produces exceptional fruit. Growing from seed can be a gamble; you never know if the new tree will be as good, or even if it will produce fruit at all, especially since some mulberries need both a male and a female plant to get any fruit. Additionally, trees grown from seed can take several years to start producing, sometimes up to five to ten years. Cuttings, on the other hand, come from mature wood, so they can start fruiting much sooner, sometimes right away.
Can You Grow Mulberry Trees from Cuttings? – Why Try It?
It’s also a really cost-effective way to get more trees. Instead of buying saplings, you can use branches from a tree you already have or get some from a friend. It feels good to grow something from scratch, and it’s a fun way to learn more about how plants work. You’re essentially cloning the parent, so you know what you’re getting.
Here are a few reasons why I’m keen on trying cuttings:
- Genetic Consistency: You get a tree identical to the parent, ensuring fruit quality and characteristics.
- Faster Fruiting: Cuttings come from mature trees, so they can produce fruit much sooner than seedlings.
- Cost Savings: It’s a cheaper way to expand your mulberry collection compared to buying new trees.
- Learning Experience: It’s a hands-on way to understand plant propagation and gardening.
When you take cuttings, you’re not just growing a new tree; you’re preserving the traits of a tree you already like. It’s like having a backup of your favorite fruit producer, ensuring you can enjoy its bounty for years to come without the uncertainty of seeds.
Some people say mulberries are easy to start from cuttings, which is encouraging for someone like me who hasn’t done this a lot before. It seems like a good starting point for learning about propagating trees.
When Is the Best Time to Take Cuttings for “Can You Grow Mulberry Trees from Cuttings?”
Figuring out the right time to take cuttings from your mulberry tree is pretty important if you want the best chance of success. It really depends on what kind of cutting you’re planning to take. Generally, you’ve got a couple of main windows.
The most common and often easiest time to take cuttings is during the summer months, specifically July and August. This is when the wood is considered “semi-hardwood.” It’s not brand new and soft, but it hasn’t fully hardened off yet either. Think of it as being somewhere in the middle – flexible but with a bit of structure. These cuttings are usually taken from the current season’s growth, and they tend to root fairly well.
Another option is taking “hardwood” cuttings. These are taken from dormant wood, usually in late fall after the leaves have dropped, or in very early spring before the buds start to swell. While hardwood cuttings can work, they sometimes have a lower success rate compared to semi-hardwood ones, especially if you don’t have specific rooting setups like bottom heat. Some sources suggest that late winter is a good time for hardwood cuttings, particularly if you plan to use rooting hormone and provide some warmth.
Here’s a quick rundown:
- Semi-hardwood Cuttings: Take these in summer (July-August) from the current season’s growth. They are usually 6-8 inches long.
- Hardwood Cuttings: Take these in late fall or very early spring from dormant wood. These are often longer, maybe 10-12 inches.
It’s worth noting that some people have had success with cuttings taken at different times, but sticking to these general periods usually gives you a better starting point. The key is to work with wood that has the right balance of maturity and vigor.
If you’re just starting, I’d definitely lean towards trying the summer semi-hardwood cuttings. They seem to be the most forgiving and give you a good chance to see those roots develop.
What Type of Cuttings Work Best?
When I first started thinking about growing mulberry trees from cuttings, I wondered which type of wood would give me the best shot at success. It turns out, like with many plants, the timing and type of cutting really matter.
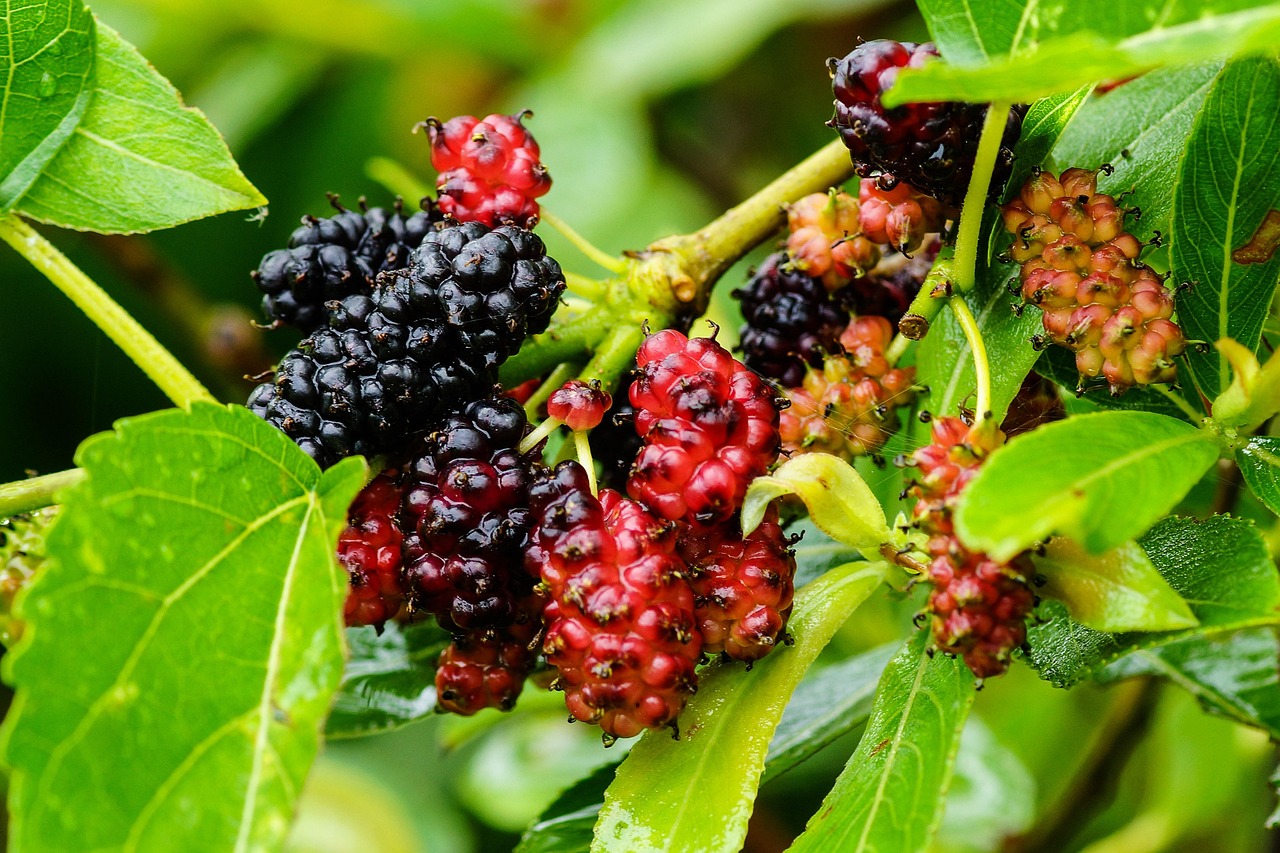
I’ve learned that you can take cuttings from mulberry trees at different stages of growth, and each has its own pros and cons. The main categories are softwood, semi-hardwood, and hardwood.
- Softwood cuttings are taken from new, flexible growth in late spring or early summer. These are usually the easiest to root, but they are also the most delicate and prone to drying out. I’ve found they need consistent moisture and a good rooting environment, like a mist system, to really take off.
- Semi-hardwood cuttings come from wood that is partially mature, typically taken in mid-summer. This wood is a bit firmer than softwood but still flexible. They offer a good balance – easier to handle than softwood, but still have a decent chance of rooting.
- Hardwood cuttings are taken from dormant, mature wood, usually in late fall or winter after the leaves have dropped. These are the toughest and most resilient, but they can also be the slowest to root and sometimes have a lower success rate. I’ve had some luck with these, especially when I provide bottom heat and use a well-draining mix.
Based on my experience and what I’ve read, softwood cuttings taken during the active growing season tend to be the most reliable for rooting mulberries, especially if you can provide the right conditions. However, hardwood cuttings can also work, particularly if you’re preparing them during the dormant season.
It’s important to remember that not all mulberry varieties root with the same ease. Some types seem to be naturally more inclined to form roots from cuttings than others. So, if one type doesn’t work out, don’t get discouraged; try a different variety or a different cutting method.
Here’s a quick rundown of what I’ve observed:
| Cutting Type | Best Time to Take | Characteristics |
| Softwood | Late Spring/Early Summer | New, flexible, fast-rooting, delicate |
| Semi-hardwood | Mid-Summer | Partially mature, firm but flexible, good balance |
| Hardwood | Late Fall/Winter | Dormant, mature, tough, slower to root |
How to Prepare Cuttings Properly for Rooting
Getting your mulberry cuttings ready is a pretty important step if you want them to actually grow roots. I’ve found that taking the time here really pays off later. First, I look for healthy branches from the current or previous year’s growth. You want about pencil-thick pieces, and it’s good to have at least three or four growth nodes on each cutting. I usually cut them to be about 6 to 8 inches long. When I make the cuts, I try to cut just below a node, which is where the little bumps are on the stem. This is often where roots will start to form.
After I have my cuttings, I clean them up a bit. This means trimming off any side shoots or leaves that are too low down on the stem, especially those that would end up below the soil line. It’s a good idea to remove most of the leaves, leaving just one or two at the very top, as too many leaves can cause the cutting to dry out before it can root. Some people like to wrap the very top of the cutting with parafilm, which helps keep moisture in, but I haven’t found that strictly necessary for mulberries.
I’ve also read about using rooting hormone, which is a powder or liquid that encourages root development. While I’ve had some success with natural options like willow water or even honey (though the effectiveness of honey is debated), a commercial rooting hormone can give you a better chance, especially with hardwood cuttings. You can find rooting hormone products online or at garden centers.
Here’s a quick rundown of what I do:
- Select healthy, current, or previous year’s growth.
- Cut branches into 6-8 inch sections, with at least three nodes.
- Make the bottom cut just below a node.
- Remove lower leaves and side shoots.
- (Optional) Dip the bottom end in rooting hormone.
It might seem like a lot of little steps, but preparing the cuttings properly is key to getting them to establish well. It’s all about giving them the best possible start.
Rooting Techniques: Soil, Water, or Mist Systems
When I first started trying to root mulberry cuttings, I experimented with a few different methods to see what worked best. Honestly, it felt like a bit of a guessing game at first, but I eventually found that the medium I used made a big difference.
For soil-based propagation, I’ve had the most luck using a mix that’s light and drains well. A common recommendation is a blend of about 70% sand and 30% compost or soil. This helps prevent the cuttings from getting waterlogged, which is a common problem. I’ve also heard good things about using coco peat, as it holds moisture well, which is great for keeping those cuttings hydrated and encouraging root development. The key is to keep the rooting medium consistently moist but not soggy.
Water propagation is another option, and it’s quite simple. I’ve taken cuttings and just placed them in jars of water. It’s easy to monitor root growth this way, but I’ve found that the roots that form in water can sometimes be a bit fragile and might struggle when transplanted to soil. Some people add things like kelp juice or even honey to the water, hoping to give the cuttings a boost, though I’m still looking into how effective those really are.
For those who want to get serious about rooting, a mist system can be very effective, especially for softwood cuttings. This involves a setup that sprays a fine mist onto the cuttings periodically. It keeps the leaves from drying out, which is important when the cuttings don’t have roots yet. While it sounds complicated, I’ve learned that building one isn’t as daunting as it might seem, and it can really improve success rates for certain mulberry varieties.
Regardless of the method chosen, ensuring consistent moisture and providing a stable environment are the most important factors for successful rooting. It’s about creating the right conditions for those tiny roots to emerge and establish themselves before the cutting dries out.
When I prepare my pots, I usually fill them with my chosen medium, making sure it’s moist. Then, I insert the cuttings, usually two or three per pot, just deep enough so they’re stable. I’ve found that placing the pots on a heat mat, set to around 70-80 degrees Fahrenheit, can really speed up the process. It gives the cuttings that extra warmth they need to start rooting. I’ll keep them on the heat mat for a couple of months, checking the moisture levels regularly. It’s a patient process, but seeing those first signs of growth is really rewarding.
Can You Grow Mulberry Trees from Cuttings — Post-rooting Care and Maintenance

So, you’ve successfully rooted your mulberry cuttings. That’s fantastic! Now comes the part where we nurture these little guys into healthy young trees. It’s not overly complicated, but paying attention to a few details will make a big difference.
First off, keep them in their initial rooting medium for a bit longer. I usually wait until I see some decent top growth, maybe a few inches tall, before I even think about moving them. This means they’ve likely developed a good root system to support that new growth. If you’re using a mix of peat moss and perlite, it’s pretty forgiving, but don’t let it dry out completely. A gentle watering when the top layer feels dry is usually enough.
- Watering: Aim for consistently moist, but not waterlogged, soil. Overwatering is a quick way to invite root rot, which is the last thing you want at this stage.
- Light: Gradually introduce your rooted cuttings to more light. If they were in a shaded spot, start by moving them to a location with bright, indirect sunlight. Avoid harsh, direct sun, especially during the hottest part of the day, as this can scorch those tender new leaves.
- Fertilizing: I tend to hold off on heavy feeding right away. Once they’ve established a bit more, a very diluted liquid fertilizer, maybe half-strength, can be applied every few weeks during the growing season. It’s better to under-fertilize than over-fertilize at this point.
It’s important to remember that these are still young plants. They haven’t developed the robust systems of mature trees yet, so they need a bit more coddling. Think of it like raising a seedling; consistent, gentle care is key.
If you notice any signs of pests, like tiny whiteflies or scale, address them promptly. A gentle insecticidal soap or neem oil can often do the trick. Remember, healthy plants are less susceptible to problems, so good care from the start really pays off. It’s quite satisfying to see these cuttings develop, and it really confirms that yes,you can grow a mulberry tree from a cutting successfully with a bit of patience and the right approach.
Common Issues & Troubleshooting in “Can You Grow Mulberry Trees from Cuttings”
Even with the best intentions, sometimes our mulberry cuttings just don’t take. It can be pretty disheartening when you’ve put in the effort and don’t see any roots forming. I’ve certainly been there. One of the most common problems I’ve encountered is a lack of rooting, or cuttings that rot before they even have a chance to root.
Here are some issues I’ve run into and how I’ve tried to fix them:
- No Rooting: This is the big one. Sometimes, despite everything, cuttings just won’t root. This could be due to the variety of mulberry, the time of year the cutting was taken, or the conditions it’s kept in. I’ve found that some varieties are just plain stubborn. If you’re not seeing any action after several weeks, it might be time to try again with a different batch or a different approach.
- Rotting Cuttings: This usually happens when the cuttings are kept too wet. The soil needs to be moist, yes, but not waterlogged. I learned to check the moisture level by feel, rather than just watering on a schedule. If the base of the cutting feels mushy or looks dark, it’s probably rotting.
- Drying Out: On the flip side, if the environment is too dry, the cuttings can shrivel up and die before they root. This is especially true for softwood cuttings. Keeping them in a humid environment, like under a plastic bag or in a mist system, helps a lot.
- Pests: While less common with cuttings indoors, I have seen tiny pests like fungus gnats or even spider mites show up. These can stress the cuttings. Keeping the area clean and avoiding overwatering can help prevent them.
| Issue | Potential Cause | Solution |
| No Rooting | Variety, cutting age, and poor rooting hormone | Try different varieties, take cuttings at optimal times, and use fresh hormones |
| Rotting | Overwatering, poor drainage | Water less frequently, and ensure good drainage in the potting mix |
| Drying Out | Low humidity, direct sun | Increase humidity, provide bright indirect light, and use a humidity dome |
| Fungal Growth | Too much moisture, poor air circulation | Improve air flow, reduce watering, and use sterile potting mix |
It’s important to remember that not every cutting will succeed. Propagation is often a numbers game. If I take ten cuttings, I might be thrilled if six of them take. Patience and observation are key. Don’t get discouraged if your first few attempts aren’t perfect; learning what works for your specific conditions and mulberry variety is part of the process.
When and How to Transplant Your Cuttings into the Ground
Once I see a good amount of root development, usually after a few weeks to a couple of months, depending on the variety and conditions, it’s time to think about moving the young mulberry plants. I usually wait until the roots are a few inches long and there’s some top growth, like a few new leaves. It’s important not to rush this step, as the little plants are still quite fragile.
Before I move them, I like to get the new location ready. I choose a spot that gets plenty of sun, at least six to eight hours a day, and has well-draining soil. If my soil is heavy clay, I’ll mix in some compost and sand to improve drainage. I dig a hole that’s a bit wider than the root ball of the cutting and about as deep.
When I take the cutting out of its pot, I try my best not to disturb the roots too much. If the roots have formed a tight ball, I might gently tease out the outer ones. Then, I place the cutting in the hole, making sure the top of the root ball is level with the surrounding soil. I fill in the hole with the soil I removed, firming it gently around the base to remove air pockets. Watering thoroughly after transplanting is key to helping the roots settle in.
I usually space my new mulberry trees about 15-20 feet apart, depending on the variety, to give them plenty of room to grow. For the first few weeks after transplanting, I keep a close eye on them and water regularly, especially if it’s dry. Once they’re established, they’re pretty low maintenance.
Here’s a quick rundown of what I do:
- Prepare the new site by loosening the soil and adding compost if needed.
- Dig a hole that is wider and as deep as the root ball.
- Gently remove the cutting from its pot, disturbing the roots as little as possible.
- Place the cutting in the hole, ensuring the top of the root ball is level with the soil surface.
- Backfill the hole with soil, firming gently.
- Water the newly transplanted cutting deeply.
- Mulch around the base to retain moisture and suppress weeds, keeping the mulch a little away from the stem.
It’s always a good idea to harden off your cuttings before moving them to their permanent spot. This means gradually exposing them to outdoor conditions over a week or two. I usually start by putting them in a sheltered spot outside for a few hours each day, then increasing the time and exposure to sun and wind.
I’ve found that transplanting in the spring, after the last frost, is generally the best time. This gives the young trees the whole growing season to establish themselves before winter arrives. If I have to transplant in the fall, I make sure to do it early enough so they have time to root before the ground freezes.
Ready to move your plant cuttings from their starter pots to their permanent home in the garden? Knowing the right time and method is key to their success. We’ve got all the tips you need to make this transition smooth for your plants. Want to learn more about giving your cuttings the best start? Visit our website for a complete guide!
Frequently Asked Questions
Can I really grow a mulberry tree from just a branch cutting?
Yes, I can confirm that growing a mulberry tree from a cutting is indeed possible. It’s a fantastic way to start a new tree that will be exactly like the parent tree. I’ve found that taking several cuttings gives me a better chance of success, as not every single one might take root.
When is the best time to take cuttings from a mulberry tree?
Based on my experience, the ideal time to take cuttings is during the spring or early summer. This is when the new growth is most active. However, I’ve also had some success with hardwood cuttings taken in late winter, especially when provided with bottom heat.
What kind of branches should I use for cuttings?
I’ve learned that using semi-hardwood cuttings, which are branches from the current season’s growth that have started to firm up a bit, works quite well. I’ve also experimented with hardwood cuttings from the previous year’s growth, but these can be a bit trickier to root without special conditions.
How do I prepare the cuttings to help them root?
After I cut the branches into segments, typically about six to eight inches long with a few leaf nodes, I dip the bottom end into rooting hormone. This really seems to encourage root development. I also make sure to remove most of the leaves, leaving just a small portion on each cutting.
What should I plant the cuttings in, and how do I care for them?
I usually plant my prepared cuttings in small pots filled with a light potting mix, often a combination of peat moss and perlite, or a good-quality seed starter mix. Keeping the soil consistently moist, but not waterlogged, is key. I also find that placing the pots on a heat mat, around 70-80 degrees Fahrenheit, significantly helps with rooting.
How long does it usually take for cuttings to develop roots?
The time it takes for cuttings to root can vary quite a bit depending on the conditions and the specific mulberry variety. I’ve had some varieties show roots in as little as two weeks when using a mist system, but for cuttings rooted in soil with bottom heat, it can take several weeks to a couple of months before I see significant root growth.
Request a Quote
Our Services