How to Grow a Healthy Honey Locust Seedling at Home
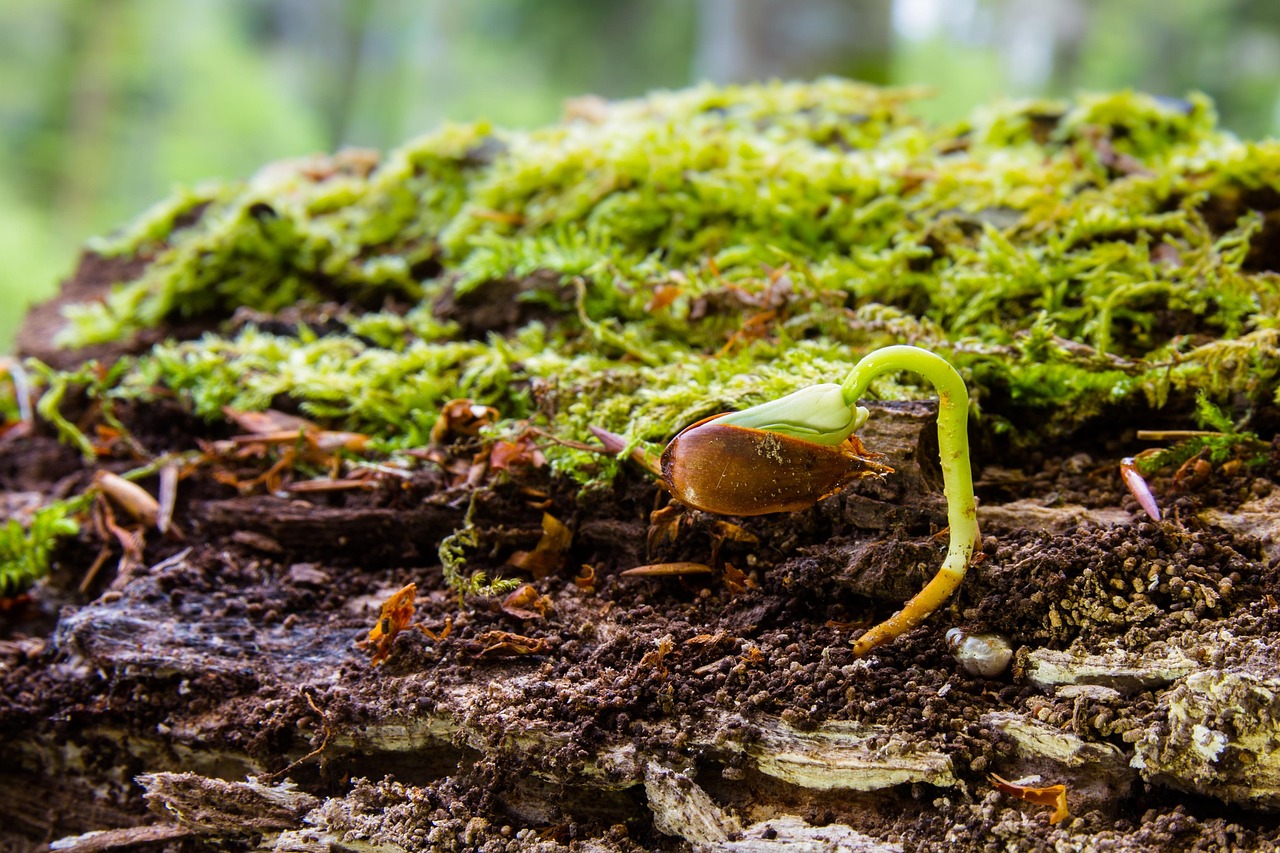
I’ve always found growing plants from seed to be a satisfying process. It feels like you’re connecting with nature. This time, I decided to try my hand at growing a honey locust seedling. It’s a neat tree, known for its delicate foliage and ability to handle urban conditions. I’ll walk you through what I learned about getting these seeds started and caring for them.
Key Takeaways
- Start with good-quality honey locust seeds, preparing them by scarifying the seed coat to help with germination.
- Cold stratification might be necessary for some seeds, followed by pre-germination steps like soaking.
- Plant seeds indoors in well-draining soil, providing adequate light and consistent moisture for germination.
- Once sprouted, continue consistent watering and maintain suitable temperatures, thinning seedlings if they become too crowded.
- Prepare to transplant your honey locust seedling outdoors after hardening it off, choosing a sunny spot with good soil.
Selection, Scarification & Storage
Starting a honey locust from seed is a neat project. When I first looked into it, I wanted to make sure I was picking seeds that had a good chance of growing. You want seeds that look plump and feel solid, not shriveled or damaged in any way. It’s a bit like picking out good produce.
Honey locust seeds have a tough outer coat, which is nature’s way of protecting them. To get them to sprout, we need to help them out a bit. This process is called scarification. It basically means breaking through that hard shell so water can get in and kickstart germination. I’ve found a couple of ways to do this that work well:
- Nicking the Seed: You can carefully use a small file or even a piece of sandpaper to gently scratch or nick the seed coat. Just be careful not to go too deep and damage the inside of the seed. I usually aim for the side opposite the little bump or hilum.
- Soaking: Another method is to soak the seeds in warm water for about 24 hours. This can soften the coat enough for water to penetrate. Some people even use hot water, but I tend to stick with warm water to avoid cooking the seed.
After scarifying, it’s important to store the seeds properly if you’re not planting them right away. I keep mine in a cool, dry place, often in a paper envelope or a small breathable bag. This helps prevent mold and keeps them viable until I’m ready to plant. The key is to keep them dry and cool until you’re ready for the next step.
It’s important to remember that not every seed will sprout, even with the best preparation. Think of it like planting a whole packet of beans; you expect a few duds. So, it’s always a good idea to start with more seeds than you think you’ll need.
Cold Stratification (If Needed) & Pre-germination Prep
Alright, so you’ve got your honey locust seeds, and they look tough, right? That hard outer shell is like a tiny suit of armor, and it means we need to give them a little nudge to get them thinking about sprouting. For honey locusts, this usually means mimicking what happens in nature, where seeds might sit through a winter before they’re ready to grow.
The main goal here is to soften that seed coat so water can get in.
There are a couple of ways I like to tackle this:
- Scarification: This is just a fancy word for scratching or nicking the seed coat. I usually grab a metal file or even some coarse sandpaper and gently rub each seed. You don’t need to go crazy, just enough to break through that tough outer layer. Be careful not to damage the inside of the seed. Some folks use a small knife or clippers, but I find filing is less likely to cause accidental damage.
- Soaking: After scarifying, or sometimes as a standalone step if the seeds don’t seem too tough, I’ll soak them. I put the seeds in a jar of warm water and let them sit for about 12 to 24 hours. You’ll notice some seeds might swell up a bit – those are the ones that are ready to go. Discard any that stay rock hard or look weird after soaking.
If your seeds are from a very cold climate, they might naturally benefit from a period of cold, moist conditions, which is called cold stratification. This is like giving them a simulated winter. To do this, you can mix your scarified seeds with a bit of damp (not soaking wet) sand or peat moss in a plastic bag or container. Then, pop that in the refrigerator for about 30 to 60 days. Just check on them every week or so to make sure the medium stays slightly moist and that no mold starts to grow. It’s a bit of a waiting game, but it can help those stubborn seeds wake up.
Remember, not all seeds will germinate, and that’s perfectly normal. Some might be duds, and others might just need a bit more time or a different approach. Don’t get discouraged if you don’t see immediate results. Patience is key when working with tree seeds.
Sowing Seedlings Indoors
Alright, so you’ve got your honey locust seeds prepped and ready to go. Now it’s time to get them started indoors. This is where we give them a good head start before they head outside.
First off, let’s talk about the home for these little guys. You don’t need anything fancy. Small pots, seed trays, or even recycled yogurt cups with some drainage holes poked in the bottom will work just fine. The key is good drainage to prevent soggy roots. I usually go for pots that are about 4 inches deep; this gives the taproot a bit of room to grow downwards.
For soil, a standard seed-starting mix is your best bet. It’s light and airy, which is exactly what young seedlings need. You can also mix in a bit of perlite or vermiculite to help with drainage and aeration. Just fill your containers, leaving about an inch of space at the top.
Now, for planting. I typically sow about two seeds per pot, just in case one doesn’t sprout. Plant them about half an inch deep. Gently cover them with soil and give them a light watering. I like to use a spray bottle for this initial watering to avoid disturbing the seeds.
As for light, this is important. Honey locusts, even as seedlings, appreciate a good amount of light. A sunny windowsill that gets at least 6 hours of direct sunlight is ideal. If you don’t have a spot like that, don’t worry. A grow light is a fantastic alternative. Keep the light about 4-6 inches above the soil surface and run it for about 12-14 hours a day. This mimics natural daylight and helps them grow strong.
Keep the soil consistently moist, but not soaking wet. Think of it like a wrung-out sponge. Overwatering is a quick way to invite problems like damping-off disease, which can wipe out your seedlings before they even get a chance.
Here’s a quick rundown of what I aim for:
- Soil: Well-draining seed-starting mix.
- Containers: 4-inch deep pots or trays with drainage holes.
- Sowing Depth: About 1/2 inch.
- Light: Minimum 6 hours direct sun or 12-14 hours under a grow light.
- Watering: Keep soil consistently moist, not waterlogged.
Germination & Early Care
Once your honey locust seeds have sprouted, the real work begins. Keeping them happy and healthy during this early stage is key to their future success. I’ve found that consistency is the name of the game here.
Maintaining the right moisture level is probably the most important thing I do. The soil should feel like a wrung-out sponge – moist, but not soggy. If the soil surface starts to look dry, I give them a gentle watering. I usually use a watering can with a fine rose attachment to avoid disturbing the delicate seedlings. Overwatering can lead to damping-off, a fungal disease that can wipe out young plants quickly, so I’m always careful about that.
Temperature-wise, honey locusts are forgiving, but they do appreciate warmth. I aim for a consistent temperature between 70-75°F (21-24°C) for the best germination and early growth. If my house is cooler, I might use a seedling heat mat placed under the containers. This provides gentle bottom heat that seems to encourage them.
As more seeds start to sprout, you’ll likely have more seedlings than you need. This is where thinning comes in. It might feel a bit brutal, but the strongest plants must thrive. I wait until the seedlings have developed their first set of true leaves, which are the ones that appear after the initial round of seed leaves. Then, I carefully snip off the weaker seedlings at the soil line with small scissors. I try to leave about 2-3 inches between the remaining seedlings. This gives them enough space to grow without competing too much for light and nutrients. It’s a tough decision, but it helps the remaining ones get a good start.
It’s important to remember that prolonged germination can sometimes have negative effects, potentially leading to the loss of heat resistance in certain contexts. This highlights a delicate balance in germination processes where timing is crucial for optimal outcomes.
I also keep an eye on the light. Seedlings need plenty of bright, indirect light. If they start to look leggy and pale, it means they aren’t getting enough light. I’ll move them to a brighter spot or consider using grow lights. Getting the light right now will prevent issues down the road when I’m thinking about transplanting them outdoors.
Here’s a quick rundown of what I aim for:
- Watering: Keep soil consistently moist, but not waterlogged. Water gently when the top layer feels dry.
- Temperature: Ideal range is 70-75°F (21-24°C). A heat mat can be helpful.
- Light: Bright, indirect light is best. Watch for leggy growth, which indicates insufficient light.
- Thinning: Remove weaker seedlings once they have their first true leaves, leaving the strongest ones spaced about 2-3 inches apart.
Transplanting Seedlings
It’s time to move your little honey locust tree seedlings from their cozy indoor pots to a more permanent spot. This is a big step for them, so we need to get it right.
The best time to transplant is usually in the spring, after the last frost has passed and the soil has warmed up a bit. This gives them the whole growing season to get established. Before you even think about moving them outside, though, you have to get them used to the real world. This process is called hardening off, and it’s super important.
Here’s how I do it:
- Start about a week or two before you plan to transplant.
- On the first day, put the seedlings outside in a sheltered spot for just a couple of hours.
- Each day, gradually increase the amount of time they spend outdoors and expose them to more direct sunlight and wind.
- Bring them in at night, especially if it’s still chilly.
When it comes to picking a spot, honey locusts aren’t too picky, but they do like well-draining soil and a good amount of sun. I usually aim for a place that gets at least six hours of sunlight a day.
When you dig up your seedlings, try to get as much of the root ball as possible. A good root system is key to helping them survive the move and thrive in their new home. If the soil is dry, water it well the day before you plan to dig.
Make sure the new location is ready. Loosen the soil where you plan to plant them, maybe mix in some compost if your soil isn’t the best. Dig a hole that’s about twice as wide as the seedling’s root ball and just as deep. Gently place the seedling in the hole, making sure the top of the root ball is level with the surrounding soil. Fill in the hole with soil, pat it down gently, and give it a good watering. This helps settle the soil and removes air pockets.
Establishing Young Trees
Alright, so your little honey locusts have made it this far – congrats! Now comes the part where we help them get going. Think of it like this: they’ve just moved into their new home, and we need to make sure they have everything they need to settle in and grow strong.
The most important thing right now is consistent moisture. Young trees, especially those just out of the seedling stage, don’t have a big root system yet. They can’t go long periods without water, even if the mature trees are tough. I aim to keep the soil around the base of the young tree consistently damp, but not soggy. You know, like a wrung-out sponge. If you can stick your finger about an inch or two into the soil and it feels dry, it’s time to water.
Here’s a rough guide I follow for watering, but remember, this can change a lot depending on the weather:
- First few weeks after planting: Water every 2-3 days. Really soak the area around the roots.
- First growing season: Water once or twice a week, depending on rain. Always water deeply.
- Second year: You can start stretching out the watering, maybe once a week or even less if it’s been rainy.
To help keep that moisture steady and also keep weeds down, I like to put a layer of mulch around the base of the tree. Just don’t pile it right up against the trunk – leave a little space there. This also helps protect the roots from extreme temperatures.
As for support, most honey locusts don’t need staking unless they’re in a windy spot or the trunk is very weak. If you do decide to stake it, use wide, flexible ties that won’t damage the bark, and make sure the stakes aren’t in the ground for too long – usually, you can remove them after the first year once the tree can stand on its own.
It’s easy to get caught up in watering every single day, but overwatering can be just as bad, if not worse, than underwatering for young trees. Soggy soil can lead to root rot, which is a real problem that’s hard to fix. So, always check the soil moisture before you grab the watering can.
Ongoing Care
Once your honey locust seedling is established, it needs ongoing care to thrive. I’ve found that a little attention goes a long way.
Fertilizing is generally not a major concern for honey locusts, as they are quite adaptable, but a light feeding in early spring can give them a good start. I usually use a balanced, slow-release fertilizer, something like a 10-10-10, just as the new leaves start to unfurl. It’s not about forcing rapid growth, but more about giving it a gentle boost. If the tree looks healthy and is growing reasonably well, I might skip fertilizing altogether. Over-fertilizing can do more harm than good, leading to weak growth that’s more susceptible to problems.
Pruning is something I do with a bit of caution. The best time to prune is during the dormant season, usually late winter or early spring, before the sap starts running. This helps prevent excessive sap loss, which can stress the tree. My approach is to remove any dead, damaged, or crossing branches. This not only keeps the tree looking tidy but also improves air circulation within the canopy, which is good for preventing diseases. I’m not trying to shape it into anything fancy, just keeping it healthy and open.
When it comes to pests, I try to keep a watchful eye. Honey locusts can sometimes attract things like webworms or develop leaf spot diseases. If I notice any signs, like chewed leaves or unusual spots, I try to address them quickly. Often, a strong spray of water can dislodge small pests. For more persistent issues, I might look into organic pest control options. It’s important to remember that a healthy tree is less likely to have serious pest problems, so good overall care is the first line of defense. Keeping an eye on your young tree is key to catching any issues early, and you can find more information on tree care.
It’s important to remember that a healthy tree is less likely to have serious pest problems, so good overall care is the first line of defense.
Here’s a quick rundown of what I look for:
- Leaves: Are they a good green color, or are they yellowing or spotted?
- Branches: Are there any broken, dead, or crossing limbs?
- Trunk: Is the bark intact, or are there any signs of damage or unusual growths?
- Pests: Have I seen any insects or signs of insect activity, like webbing or holes in the leaves?
When & Where to Plant Out Permanently
Alright, so you’ve got a healthy honey locust seedling, and now it’s time to think about its forever home. I usually wait until the last frost has passed, typically late spring or early summer, depending on where you are. This gives the young tree a good, long growing season to get established before winter hits.
When picking a spot, remember these trees can get big, even the thornless varieties. I look for a place with full sun – they seem to thrive with at least six hours of direct sunlight a day. Good drainage is also key; they don’t like having their roots sit in soggy soil.
- Site Selection Checklist:
- Full sun exposure (6+ hours daily)
- Well-draining soil
- Plenty of space for mature growth (consider both height and spread)
- Away from structures where roots might cause issues later
Now, about the invasiveness part. While I love growing things from seed, I’ve learned that honey locusts, especially the wild types, can be a bit… enthusiastic. They can spread through their seeds, and if you have a wild variety, you might find little seedlings popping up where you don’t want them. Some folks have found them popping up in pastures or natural areas. If you’re planting a thornless, podless variety, this is much less of a concern. It’s important to know which type you’re growing. If you’re unsure or if you’re in an area where non-native plants tend to spread easily, it might be wise to stick to the cultivated, thornless, and podless cultivars to avoid any potential headaches down the road. I always double-check the variety I have and consider the local environment before planting anything permanently.
Knowing the right time and place to move your plants outside is super important. Some plants can spread too much and become a problem if not planted carefully. Want to learn more about planting and keeping your garden in check? Visit our website for all the details!
Frequently Asked Questions
What is the best way to start growing honey locusts from seeds?
To begin growing honey locusts from seeds, I first pick out seeds that look healthy and aren’t damaged. Then, I gently scratch the outside of the seed with a file or soak it in warm water overnight. This helps the seed absorb water, which is important for it to start growing.
How much sunlight do honey locust seedlings need?
My honey locust seedlings need a good amount of light to grow well. I make sure they get at least six to eight hours of direct sunlight each day. This helps them grow strong and healthy.
What kind of soil is best for honey locust seeds?
I find that honey locust seeds do best in soil that drains well and stays a bit moist. The soil should also have a pH level between 6.0 and 8.0. If the soil isn’t quite right, I sometimes add things to it to make it better for the seeds.
How often should I water my honey locust seedlings?
It’s important to keep the soil consistently moist for my honey locust seedlings, but not soaking wet. I check the soil regularly and water when the top layer feels dry. Watering deeply helps the roots grow strong.
Are there any common problems I should watch out for with honey locust seedlings?
I keep an eye out for common issues like pests or diseases. Sometimes, aphids can be a problem, and I might use a mild soapy water spray to get rid of them. Fungal problems can happen if the soil stays too wet, so I make sure to water carefully.
When is the right time to plant my honey locust seedlings outside?
I usually wait until my honey locust seedlings are a bit bigger and have been outside for a short time to get used to the weather. This process is called ‘hardening off.’ I plant them outside when the danger of frost has passed, typically in the spring.

