Green Ash Tree Seed Pods: Facts, Growth & Care Tips
When I first decided I wanted to grow a green ash tree from seed, I had to figure out how actually to get those seeds. Finding and collecting green ash tree seed pods isn’t too difficult if you know what to look for.
Identifying and Collecting Green Ash Tree Seeds
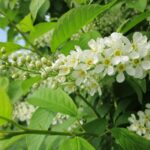
Ash seeds, which are technically called samaras, have a distinctive shape. They’re like little winged keys, designed by nature to catch the wind and travel. It’s important to collect seeds from healthy-looking trees to give your future tree the best start.
Locating Mature Ash Trees
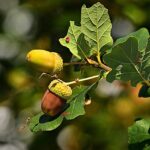
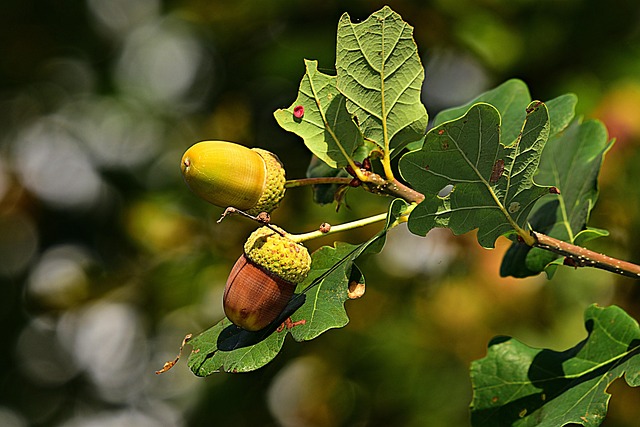
First things first, I need to be sure I’m looking at an ash tree. The easiest way for me to tell is by looking at the leaves. Ash trees usually have compound leaves, meaning one leaf stalk has several smaller leaflets attached to it. The bark on mature trees often has a pattern that looks a bit like diamonds. If you’re not sure, it can be helpful to check out resources on local tree species to confirm you’ve found the right kind of tree.
Recognizing Viable Green Ash Seed Pods
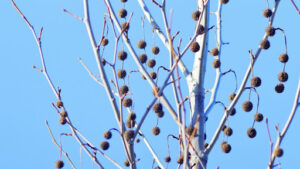
Once I’ve found a likely ash tree, I look for the seed pods, or samaras. They start green, but as they mature, they turn a golden-brown color. This color change is a good indicator that they’re ready for collection. I also look for seeds that are starting to dry out and might be detaching from the branches. Sometimes, they’ll even fall to the ground in little clusters. It’s worth noting that not every seed you find will be viable, meaning it will be able to sprout. Factors like how mature the seed was when collected and whether it was damaged by insects or disease can affect its ability to grow. Because of this, I always try to collect more seeds than I think I’ll need.
Here’s a quick look at what makes a good ash seed:
- Color: Golden-brown is ideal.
- Shape: Intact winged samara.
- Condition: Free from obvious damage or mold.
Gentle Collection Methods
When it comes to actually gathering the seeds, I try to be gentle. The best time to collect is usually from late summer through early fall, typically August to October, depending on the weather in my area. I prefer to collect on a dry, calm day. Windy days can make the seeds scatter everywhere, and wet conditions just make the whole process messier.
There are a few ways I go about it:
- Ground Collection: I often collect seeds that have already fallen to the ground. This is easy and doesn’t harm the tree at all. I just sweep them up or pick them out of any leaves.
- Branch Shaking: If there are plenty of seeds still on the tree, I might gently shake a branch. I usually place a bucket or a large cloth underneath to catch the falling seeds. Safety first, though – I only do this if I can reach the branches easily or with a stable ladder.
- Hand Picking: Sometimes, seeds are within easy reach, and I can just pick them directly off the tree.
After collecting, I spread the seeds out on a flat surface to dry completely and to remove any extra bits of leaves or twigs. This helps make sure I’m storing only the good seeds. Learning about the specific needs of ash seeds can really help set you up for success.
Preparing Green Ash Tree Seeds for Planting
So, you’ve managed to collect some green ash seeds, which is great! Now, before you just toss them in the dirt and hope for the best, there are a couple of things I usually do to give them a better chance of sprouting. It’s all about mimicking what they’d naturally go through if they fell on the ground and waited for spring.
Understanding Seed Dormancy Requirements
Green ash seeds, like many tree seeds, have a natural built-in pause button called dormancy. This is basically their way of saying, ‘Nope, not the right time to grow yet!’ They need specific conditions to break out of this sleep. For green ash, this usually means they need a period of cold, followed by warmth, to signal that winter has passed and it’s safe to start growing. If you skip this step, you might find your seeds just sitting there, no matter how much you water them.
Getting seeds from a healthy parent tree is also a good start. If you’re collecting them yourself, try to find trees that look strong and disease-free. This gives the seeds the best possible start. Remember, patience is really important when you’re working with ash seeds; they have their own timeline for germination, and it’s not always quick.
The Role of Cold Stratification
This is where cold stratification comes in. It’s a fancy term for giving the seeds a cold, moist period that mimics winter. I usually do this by mixing the seeds with a bit of damp sand or peat moss in a plastic bag or container. Then, I pop that into the refrigerator for about 60 to 90 days. It’s important to check on them every so often to make sure the material stays damp but not soaking wet. This cold treatment is what tells the seed it’s time to wake up when the conditions are right. It’s a pretty neat trick nature uses, and we can just copy it in our fridge!
| Stratification Period | Temperature Range | Medium |
| 60-90 days | 35-41°F (1-5°C) | Damp sand/peat moss |
Soaking Seeds for Enhanced Germination
Sometimes, especially if the seed coat feels really hard, a soak can help too. I’ll put the seeds in a cup of water, but not boiling water – just warm tap water is fine. I let them sit in there for about 24 hours. If they don’t seem to have swollen up much, I might try another 24-hour soak. This helps soften that outer shell so moisture can get in more easily. After soaking, I usually drain any excess water and let them air dry for a bit before planting. This prevents them from getting too soggy right before they go into the soil. It’s really about giving the seeds a head start, simulating the natural cycle they’d go through if they fell to the ground in autumn and waited through winter. This process helps them understand that it’s time to grow when the conditions are right. Learning about the specific needs of ash seeds will really help set you up for success.
Sowing Green Ash Tree Seeds for Optimal Growth
Alright, so you’ve got your green ash seeds all prepped and ready to go. Now comes the part where we get them into the soil. It’s not overly complicated, but a few key things can really make a difference in whether you end up with a healthy little tree or just… well, dirt.
Choosing the Ideal Planting Location
First off, where are you planting? If you’re going straight into the ground, pick a spot that gets a good amount of sun. Ash trees aren’t shy about needing light; aim for at least six to eight hours of direct sunlight every day. Also, think about how big these trees get. They can spread out quite a bit, so don’t plant them right up against your house or other plants. Give them some breathing room. If you’re starting them in pots, that’s fine too, but the same sun requirements apply. A sunny windowsill is a good start, but sometimes a grow light is needed, especially when the days get shorter. Remember to rotate those pots so all sides get a fair share of the light.
Proper Sowing Depth and Spacing
When you’re actually putting the seeds in, aim for about an inch deep. You can use a trowel or even just your finger to make a little hole. Just cover them up gently with soil. If you’re planting a few seeds together, give them some space. For planting outdoors, spacing them about three to five feet apart is a good idea. This stops them from competing too much for light and nutrients later on. If you’re planting multiple seeds, it’s a good idea to label where you put them, especially if you’re trying different methods or have seeds from different trees. This way, you can track what works best for your situation. Patience is really key here. Ash seeds can take a few weeks to sprout, sometimes even longer. Just keep the soil moist and the spot sunny, and try not to fuss over them too much. They’ll let you know when they’re ready to show themselves.
Selecting the Right Soil Mix
If you’re planting directly into the ground, I’ll loosen up the soil first. This helps the seeds get a good start. I’ll also pull out any weeds that are already there. Ash trees aren’t too picky about soil, but they do best in soil that’s a bit on the acidic side or neutral. If I’m not sure about my soil, I might test its pH level. For pots, I’ll use a potting mix that drains well. Heavy soil that stays too wet isn’t good for ash seeds; they like it moist, but not soggy. You want something light and airy that holds some moisture but lets the extra water escape. After planting, give them a good watering. You want the soil to be moist, but not like a swamp. Too much water can be just as bad as too little. A gentle watering can or even a spray bottle works well, so you don’t wash the seeds away. For more on the adaptability of these trees, you can check out the Green Ash tree information.
Here’s a quick rundown of what I’m looking for in a planting spot:
- Sunlight: At least 6-8 hours of direct sun daily.
- Space: Room for the tree to grow tall and wide.
- Soil Drainage: Soil that doesn’t hold too much water.
Getting the soil and site prepared properly is a step I don’t skip. It really makes a difference in how well the seeds do later on.
Nurturing Seedlings from Green Ash Tree Seeds
Alright, so you’ve got your little green ash sprouts. Now comes the part where I help them grow into something substantial. It’s not overly complicated, but you do need to pay attention to a few things.
Providing Adequate Sunlight Exposure
These little guys really like their sun. I aim for at least six to eight hours of direct light each day. If I’m growing them indoors, a sunny windowsill is good, but I might need a grow light, especially when the days get shorter. Just remember to rotate the pots so all sides get a fair share of the light. Too little light and they’ll get tall and spindly, which isn’t a good look.
Mastering Watering and Drainage
Watering is another big one. I want the soil to be moist, but not a swamp. Soggy soil is a fast track to root rot, and nobody wants that. I check the soil daily, especially when it’s warm out. If the top inch feels dry, it’s time to water. Less water is needed when it’s cooler, but don’t let them dry out completely. Good drainage is key, whether they’re in pots or in the ground. I’ve found that using pots with drainage holes is a must.
Ensuring Good Air Circulation
Airflow is surprisingly important. Too much dampness with no air movement can invite all sorts of fungal problems. I make sure my seedlings aren’t crammed together, and if they’re inside, I keep them in a spot with decent ventilation. It helps prevent issues before they even start. For more on the adaptability of these trees, you can check out the Green Ash tree information.
Dealing with pests is also a common part of growing anything, and ash seedlings are no different. Keep an eye out for aphids or beetles. A gentle wash with water or some insecticidal soap usually sorts them out. If things get serious, neem oil is a good option. It’s all about observation and responding appropriately. With a bit of care, your seedlings will grow strong.
Long-Term Care for Growing Green Ash Trees
Once your Green Ash seedlings have established themselves, the focus shifts to their long-term health and development. It’s not overly complicated, but paying attention to a few key things will make a big difference in how well your tree grows over the years. I’ve found that consistent, gentle care is the best approach.
Fertilizing Young Ash Trees
When it comes to feeding your young Green Ash, I tend to be a bit conservative. Applying a balanced fertilizer in early spring is generally a good idea. This gives the tree a nice boost as it starts its active growth for the season. However, I’ve learned that overdoing it can actually be counterproductive. Too much fertilizer can encourage a lot of leafy growth, but might not help the root system develop as strongly. So, I stick to the recommended amounts, usually just once a year. It’s better to let the tree grow at its own pace rather than forcing it.
Monitoring for Pests and Diseases
Keeping an eye out for any unwelcome visitors is part of the routine. I usually do a quick walk-around every so often, just checking the leaves and bark for anything unusual. The main thing I’m aware of is the Emerald Ash Borer, though thankfully, I haven’t had any issues with it yet. If I do spot something, like aphids or other small insects, I try to deal with it early. Sometimes a strong spray of water is enough, or I might use insecticidal soap. For more stubborn problems, neem oil is something I keep on hand. Early detection really is key here.
Understanding Transplanting Needs
This is something I think about for the future. While I’m focused on growing from seed now, eventually, if I’m planting these in a permanent spot in the yard, I’ll need to consider transplanting. The Green Ash is a pretty adaptable tree, and it can handle different soil types, but it does prefer well-drained soil. If I’m moving a young tree, I’ll make sure to dig a wide root ball and water it well afterward. It’s a bit of a process, but it helps the tree settle into its new home. For more on how these trees grow, you can look into general tree growth stages.
Transplanting is a delicate phase for any young tree. It’s important to disturb the root system as little as possible and to provide consistent moisture immediately after moving it to its new location. This helps the tree recover from the stress and begin establishing new roots.
Characteristics of the Green Ash Tree
When I started looking into the Green Ash, I was really struck by how much this tree can do. It’s not just another tree in the landscape; it’s got a lot going for it. For starters, it grows pretty fast. I mean, you can plant one, and in about twenty years, it can easily be 50 to 60 feet tall. That’s a significant amount of shade and presence in a relatively short time. It’s the kind of tree that makes you feel like you’ve made a real impact on your property pretty quickly.
Fast Growth and Mature Size
This rapid growth is one of the main reasons people choose the Green Ash. It’s not a tree that requires decades to reach a respectable size. I’ve seen them shoot up, and it’s quite impressive. They generally top out between 50 and 60 feet, with a spread that can be just as wide, creating a nice, full canopy. It’s a good option if you’re looking for mature shade without a long wait.
Adaptability and Native Range
What I find really interesting is how adaptable the Green Ash is. It’s native to a huge chunk of North America, from the eastern parts all the way to the Rockies. It doesn’t seem too picky about soil, either. It can handle wet spots, which is a bonus, and it’s also tough enough to deal with city conditions like pollution and compacted soil. This makes it a solid choice for a lot of different places, whether you’re in a rural setting or a more urban environment. It’s a tree that can really hold its own.
Ecological and Historical Significance
Beyond just its looks and growth, the Green Ash has a history. Native American tribes used their wood for all sorts of things – tools, weapons, even canoes. It was a really important resource for them. It’s also a good tree for the environment. It helps clean the air by taking in carbon dioxide, and its seeds and leaves provide food and shelter for wildlife. Planting one is like adding a little ecosystem to your yard. It’s amazing how much a single tree can contribute. I read that a mature Green Ash can absorb a good amount of carbon dioxide each year, which is pretty neat when you think about it. It’s also known to help with soil stability because of its root system, which is a big plus if you have any slopes or areas prone to erosion. I’ve seen some information suggesting that its seed pods can sometimes be mistaken for other ash varieties, so it’s always good to be sure you’ve identified it correctly, especially if you’re collecting seeds from a specific descriptive phrase.
The Green Ash is a tree that offers a lot. It grows quickly, can get quite large, and is tough enough to grow in many different places. It also has a history of being useful to people and plays a role in supporting local wildlife and the environment. It’s a tree that keeps on giving, from its shade to its ecological benefits.
The Green Ash tree is known for its tough wood and fast growth. It’s a popular choice for many yards because it’s pretty easy to care for. If you’re thinking about adding one to your landscape or need help with an existing tree, check out our website for expert advice and services. We can help you keep your trees healthy and beautiful!
Frequently Asked Questions
How can I tell if my green ash tree seeds are ready to collect?
I look for the small seeds, winged pods called samaras, to be mature and well-formed. They usually turn a golden-brown color. This typically happens between September and December, depending on the local climate. I make sure they don’t have any mold or damage, and I always gather more than I think I’ll need, just in case some don’t sprout.
Why is cold stratification important for green ash seeds?
I understand that green ash seeds have a natural dormancy that needs to be broken. Cold stratification mimics the winter conditions they would experience in nature, signaling to the seed that it’s time to grow. Without this cold period, my seeds might not sprout, or they could take a very long time to do so.
How long should I expect it to take for green ash seeds to sprout?
I’ve learned that patience is key. It’s common for green ash seeds to take about 2 to 4 weeks to sprout after planting. However, sometimes they can take even longer, and it’s not unusual for some seeds to wait until their second year to sprout, especially if the stratification wasn’t perfect.
What should I do if my green ash seedlings are growing tall and thin?
When I see my seedlings getting tall and spindly with weak stems, it usually means they need more light. Green ash trees really thrive in full sun, so I move them to a spot where they can get at least 6 to 8 hours of direct sunlight each day. Using a grow light can also help if natural light is limited.
What kind of soil is best for sowing green ash seeds?
I prefer to use a potting mix that drains well if I’m starting seeds in pots. If I’m planting directly in the ground, I loosen the soil and make sure it doesn’t hold too much water. Heavy, soggy soil isn’t good for ash seeds; they like it moist but not waterlogged.
What are the main characteristics of a green ash tree?
I know that green ash trees are fast growers, often reaching 50 to 70 feet tall. They are very adaptable and native to eastern North America. Historically, Native American tribes used their wood for various tools and items. They also play an important role in the environment by absorbing carbon dioxide.
Request a Quote
Our Services